Thursday, April 30, 2020

20 Years of KTQ BOM Block #8

Block #8 - Pumpkin Trio

We're eight weeks into our year long block-of-the-month quilt, 20 Years of KTQ, and still going strong. This weeks block is easy pumpkins and checkerboard. The pumpkin blocks are assorted size squares and rectangles with connecting corners to give a more rounded look.

Draw a chalk line diagonally on the wrong side of the tan background square with a straight edge. Position the square on one corner of the pumpkin, right sides together; stitch on the drawn line. (Of course, I should have used colored chalk and dark thread so it would show up better.)


Trim the corners 1/4" away from the stitching line. 


My best tip for connecting corners? Press seams open after trimming the triangles. I open the seam with the tip of my iron and dry press the seams open first, then spray with sizing and press again. Be careful not to stretch the seam while pressing the bias edges or it will distort the corners.


 Here are Kathy's pumpkins and checkerboard strip, ready to be sewn together. The pumpkin leaves and stems will be added as fusible applique later this year.


This week, we're also piecing mini checkerboard sections as filler for various parts of the quilt. Kathy noticed a cutting error (my counting skills evidently need a little practice).

Section A - cut (15) dark squares and (14) tan squares (need (15) tan squares) 


Please let me know in the comments if you have any questions, or check out the 20 Years of KTQ Facebook group for quilter's finished blocks and comments. I love hearing from you and seeing your progress.

See you May 15th. Have a good week.

Tuesday, April 28, 2020

Star Cluster Quilt-a-Long

Week #2

How's everyone getting along? Are you finished with your first twelve churn dash blocks? Good! Me too. We're going to use seven of them for the center of stars this week. You can use the color guide in the pattern that will result in the exact look of my quilt, or mix and match your fabrics any way you wish.

I chose to use my new Sweet Holly Christmas fabric for my second quilt, just for fun. I merely substituted black for blue and red for purple. Find the swatch chart HERE to see the whole line. After making (12) churn dash blocks last week - 3 each red, green, gold and black - I selected (7) assorted churn dash blocks for the centers of the large stars - 2 each gold, black and red, 1 green. I added coordinating prints in tans and darks to each of the seven churn dash blocks to make the stars.

Here are my completed blocks so far...


Star blocks are a favorite among quilters and pretty easily pieced. Once I realized a couple of important steps, they've gone together even easier for me. 

Step #1 - When making connecting corners (CC) for star points, lay a square on the end of a rectangle, right sides together. For a perfectly straight stitching line, mark a line diagonally from corner to corner with a chalk marker (or your favorite marking tool) on the wrong side of the dark star point square. Follow the line to stitch. Or line up the outer corner with the "0" line on your sewing machine tray, as shown below, and stitch toward the corner. Use the method you're most comfortable with that delivers the best results for you. My tip is: Always begin stitching from the inside corner, not the outside corner. If you begin stitching on the outside corner, there is more chance your fabric will bunch as it's pushed by your presser foot and not stitch as smoothly.    

Step #2 - After trimming the excess tan and dark triangles 1/4" away from your stitching line, press the seam open, beginning in the center, not on the corner. At this point, you're pressing across bias edges. This helps prevent stretching and distortion of the star point connecting corner and the background rectangle. I use the point of my iron to open the seam and dry press, then follow up with a spray of sizing and press again for a nice, crisp finish.


That reminds me, I promised I'd share Joy's recipe for sizing with you this week. It's much simpler than I realized.
Joy's Home Brew Sizing 

Pour 2 cups out of a gallon jug of distilled water. 
Pour in 1 cup potato vodka and 3/4 to 1 cup liquid Sta-Flo starch.
Shake to mix and fill your favorite sprayer. 


Once you've sewn your star point units, it's time to sew a block together. Here is a Churn Dash Star  laid out and ready to be pieced.

Below is the finished Churn Dash Star block, measuring 10 1/2" square.


I'm enjoying piecing this quilt the second time around as much as the first. I love that we're building on the blocks from the week before to create new blocks. Check in next week for more Star Cluster fun. 

Before I go, I'd like to share Kathy's blocks using my Meadowlark Pond fabric collection. Beautifully done.


Tuesday, April 21, 2020

Star Cluster Quilt-a-Long Week #1

Week #1- Churn Dash Blocks

Welcome to the first block of my Star Cluster quilt-a-long! I'm really excited to make this quilt again in a new colorway, and hosting a quilt-a-long has made me stick to it instead of putting it off. I chose my new Sweet Holly Christmas collection, coming in June, for the second time around. I appreciate all of you holding me to a schedule.

This week, we're starting at the beginning of the pattern with 5 1/2" churn dash blocks. There are (12) in the quilt in assorted colors. With Sweet Holly, I'm making (3) each of gold, green, red and black. Here are my fabric choices. Find the Sweet Holly fabric chart HERE and print one for reference, if you wish.


Technically, the half square triangles (HST) for the churn dash blocks are cut
2 3/8" for a 1 1/2" finished block, but I usually add an 1/8" to the cutting dimensions to allow for trimming. To cut the dark squares, I cut a 2 1/2" strip off of the short end of the fat 1/8's and subcut (3) 2 1/2" squares - one for the center and two for the HST.


For the tan background fabrics of the churn dash blocks, I cut (2) 2 1/2" strips from the short width of the fat 1/8's, then subcut the squares and rectangles needed. 


To make the HST, I drew a chalk line diagonally on the wrong side of the dark squares and layered it right sides together with the selected tan squares. Then, I stitched on both sides of the chalk line. I let my 1/4" presser foot run on on the edge of the chalk line in both directions for a scant 1/4" seam allowance for more room to trim.


Press the center seam open, spray with sizing, Flatter, or the potion of your choice. My current favorite is Joy's homemade brew with potato vodka that she concocted for our retreat last summer. It spritzs on lightly, takes out creases well and adds a nice crispness to the fabric. Good stuff! I'm running low, so will get the recipe from her and share with you next week.


For trimming HST, I'm a huge fan of Quilter's Select tools - rotary cutter, mat and rulers. The rotary cutter glides through fabric like a dream. If you have wrist issues after cutting alot, try this unique cutter. The rulers are great, too, with fine black lines that are easy to read and a film on the back that keeps them from slipping. After I line up my 45 degree line on the block and cut the right side, the square ruler stays put and doesn't move when I cut across the top.


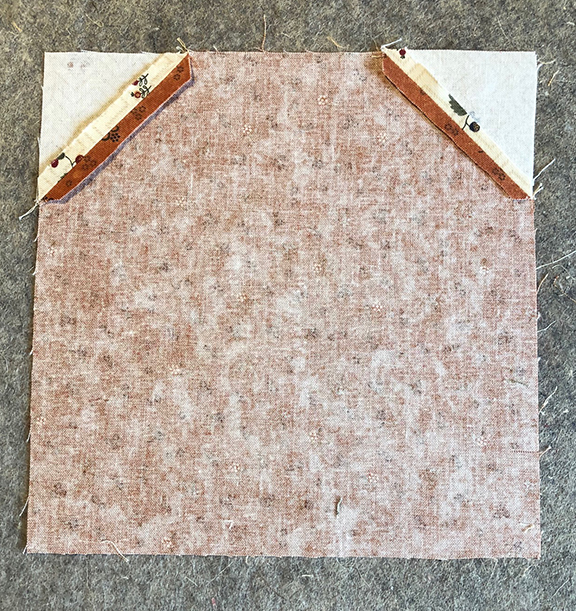
Here's my Churn Dash block in three rows with top and bottom row seams pressed away from the HST, and the center seams pressed toward the tan rectangles. Some quilters press all their seams open, but I like to nest my seams in a block where the intersections need to be accurate. It just works better for me. I spray my rows with sizing as I'm pressing.


 My finished Churn Dash measures 5 1/2" square - Woohoo! I love it when a block comes together. Honestly, I only made 8 today, but plan to catch up tomorrow.


My piecer extraordinaire, Kathy Limpic, is also quilting along with us and is sharing her blocks made from On Meadowlark Pond. She sent this great picture of her (12) completed blocks. Thanks, Kathy!


Please post your blocks as you complete them. It's always inspirational (and motivational) for me to see your progress. We need to keep each other moving forward and encourage progress. Knowing you're all out there stitching with me is awesome!


See you next week for the next blocks!

Thursday, April 16, 2020

Star Cluster Quilt-a-long Reminder

Tuesday, April 21st

Will you join me for the Star Cluster quilt-a-long? I'll post the first block next Tuesday, April 21st. All of the orders for kits we've received were shipped by Tuesday this week, so you should have your box in time. We only have a few fat 1/8 bundles left, so order now if you're interested in a Star Cluster kit. The pattern comes with the kit or is available at ktquilts.com under KT SPECIALS. Also available as a PDF downloadable pattern under PDF DIGITAL PATTERNS. Grab a pattern, dig into your stash and let's do this!

Star Cluster with a wagon full of Through the Years' goodies!

Wednesday, April 15, 2020

20 Years of KTQ Block-of-the-Month

Block #7 - Arrowheads

Sorry for the late post today. Totally forgot what day it was. Is that happening to all of you? I just work and sew and work and sew and never go anywhere, so one day blends into the next. Anyway, let's talk about Block #7 for 20 Years of KTQ block-of-the-month quilt. Are you keeping up? Have questions so far? Comment here or on Facebook. Let's chat.

Arrowheads is made up of half square triangles (HST) and squares. Pretty straight forward. I always list the cutting directions for exactly the measurement you would need for a HST. For instance, for a 2" finished HST, you would cut a 2 7/8" square (always add 7/8" to the finished size desired). But, I always add an 1/8" so I have some wiggle room to trim down my blocks. I usually add a note about it at the bottom of the cutting instructions. For the block-of-the-month, there's a page exclusively for piecing HST including my tips and tricks for perfect blocks.

So, once the HST are pieced and trimmed, it's all just assembling the block. If you're having trouble getting the pieced half of the block the exact size as the A-dark triangle, try making the D-tan setting triangles a bit larger, then trim after piecing in with B/C. It's not the ideal way, but if it helps from throwing the block against the wall, it's worth it.

Here's the Arrowheads block, step-by-step...


Here are Kathy's blocks with sashing.


I'll see you on May 1st for Block #8. Thanks for following along.


Saturday, April 11, 2020

New at Kansas Troubles

KT Attic

I've been taking advantage of more time at home to sort/clean/organize upstairs in the KT Retreat kitchen and storage room. Over the years, I've collected red and white restaurant ware and accumulated other pieces in assorted colors in the process. I'm trying to pare down some of my treasures and would love to share them with all of you. Check out the new link - KT ATTIC - under the drop down menu KT WEB STORE at ktquilts.com for a first look at a few of the vintage restaurant ware I'm willing to part with. Here are a few examples...find them HERE.

6-pc set of green stripe restaurant ware

Unique blue/white butter pat (3" x 3")

Fun stenciled green/cream platter

I grouped matching items together in sets, but if you're interested in just a couple pieces, call me and we'll talk.

I plan to post new items each weekend - vintage quilts, antique sewing items, more restaurant ware, home decor and more! Watch to see what I uncover in the KT Attic (storage room).

Friday, April 10, 2020

Through the Years is HERE!

KT Winner

First, the winner of our Star Cluster pattern - PDF version - is.....

Hildy - Beautiful quilt would love to win a copy! I'm glad March is over it felt like it lasted a year. Stay healthy and safe:-)

I'm with you, Hildy! But April is taking it's sweet time here in Kansas, too. We've gone from freezing temps to 80-90's, and back again. Now there's possible snow over the weekend. What's up, Mother Nature? I've planted a few veggies this year since I'm home more and not sure what to expect this summer. I love having the grankids around to help with the heavy lifting. 

Through the Years Fabric Collection

We're also taking full advantage of the extra help to move bolts and rolls of fabric and boxes of precuts. Since the KT Quilt Shop is closed for now, there's fabric, fabric, everywhere! Find Through the Years HERE.


Bolts and Honey Buns of Through the Years

Need a fat 1/8 bundle for Star Cluster? We've got 'em!

Joy is cutting kits as fast as she can so you'll be ready for my new Star Cluster quilt-a-long later in the month. I love the lap quilt with it's assorted sizes of churn dash and stars, twinkling against a yummy assortment of tan prints. Can't wait to start another one, maybe in my new Christmas line, Sweet Holly, coming in June. I'll post 4-5 times beginning Tuesday, April 21st, piecing one block at a time. Join me here, free. Order your pattern or the kit HERE. It's our KT April Special, so you'll save BIG! The kit is just $108 with Free Shipping (a savings of more than $35 including shipping). Don't delay, we've sold almost half of our kits already! See you soon!

Star Cluster


Wednesday, April 1, 2020

KT April Special

Star Cluster - Kit Special and Quilt-a-Long

Let's make a new quilt together! I enjoyed playing with the various size blocks and fabrics in my new Star Cluster kit and can't wait to make another one. I'm gathering fabrics now to begin a quilt-a-long later this month. Moda is just now shipping our Through the Years fabric collection, hopefully to arrive later this week. Then, Joy will cut kits and we can ship ASAP. Because of the delay in shipping, we'll start the Star Cluster Quilt-a-Long on Tuesday, April 21st and continue for 5 weeks every Tuesday. We'll make blocks in the order they appear in the pattern, sharing ideas for connecting corners, pressing and perfecting our piecing. Blocks range in size from 5" to 15" to 2 1/2" finished. It was a challenge for me but so satisfying to complete. I'd love to hear some of your tips, too.

The Star Cluster kit starts with a Through the Years fat eighth bundle for a scrappy look plus yardage and includes the pattern. Regular retail is $134.95. For April, it's only $105 plus FREE SHIPPING! That's a savings of more than a $40 including cost of shipping.

Find the KT April Special HERE


I'll post a reminder on Instagram each Tuesday to remind you to come here for the quilt-a-long. Follow me so you don't miss a single post.

Because we're all pretty much stuck in the same boat (6 feet apart, of course), watch here for info later in the month on a second KT Special.

Want to quilt-a-long using your stash? We have the instructions available as a PDF download or printed patterns. Comment below to win a PDF pattern.